

There's nothing quite like the excitement of transforming simple ingredients into creamy, dreamy frozen treats with your ninja creami recipes. As Eya, I've fallen completely in love with this incredible machine that lets me create healthy ice cream, protein-packed sorbets, and indulgent frozen yogurt right in my kitchen. Whether you're craving a high protein snack after your workout or want to surprise your family with a low-calorie dessert that tastes absolutely decadent, these tested recipes will show you exactly how to master your Ninja Creami. From troubleshooting crumbly textures to meal prepping frozen bases, I'm sharing all my secrets for perfect results every time.

Why You'll Love These Ninja Creami Recipes
These ninja creami recipes will revolutionize how you think about frozen treats. Unlike traditional ice cream makers, the Ninja Creami transforms frozen solid bases into silky, scoopable desserts in just minutes. I've perfected these ninja creami recipes to give you that perfect creamy texture every single time.
What makes these recipes special? They're incredibly versatile – from high protein ice cream using Greek yogurt and protein powder to refreshing sorbet made with fresh fruit. Many use healthier ingredients like almond milk, cottage cheese base, and sugar substitutes without sacrificing taste. The best part? You can meal prep multiple pint containers and have personalized frozen treats ready whenever cravings hit.
Whether you're following a low-calorie diet, need post-workout fuel, or simply want to indulge guilt-free, these ninja creami recipes deliver restaurant-quality results. From classic vanilla to innovative protein-packed flavors, there's something here for every taste and dietary need.
Jump to:
- Why You'll Love These Ninja Creami Recipes
- Ninja Creami Recipes Ingredients
- How to Make Ninja Creami Recipes
- Top Tip
- Ingredient Substitutions & Variations
- Storage and Reuse Instructions
- What to Serve With These Ninja Creami Recipes
- Grandmama's Magic Touch
- FAQ
- More Recipes You'll Love
- Easy Ninja Creami Recipes
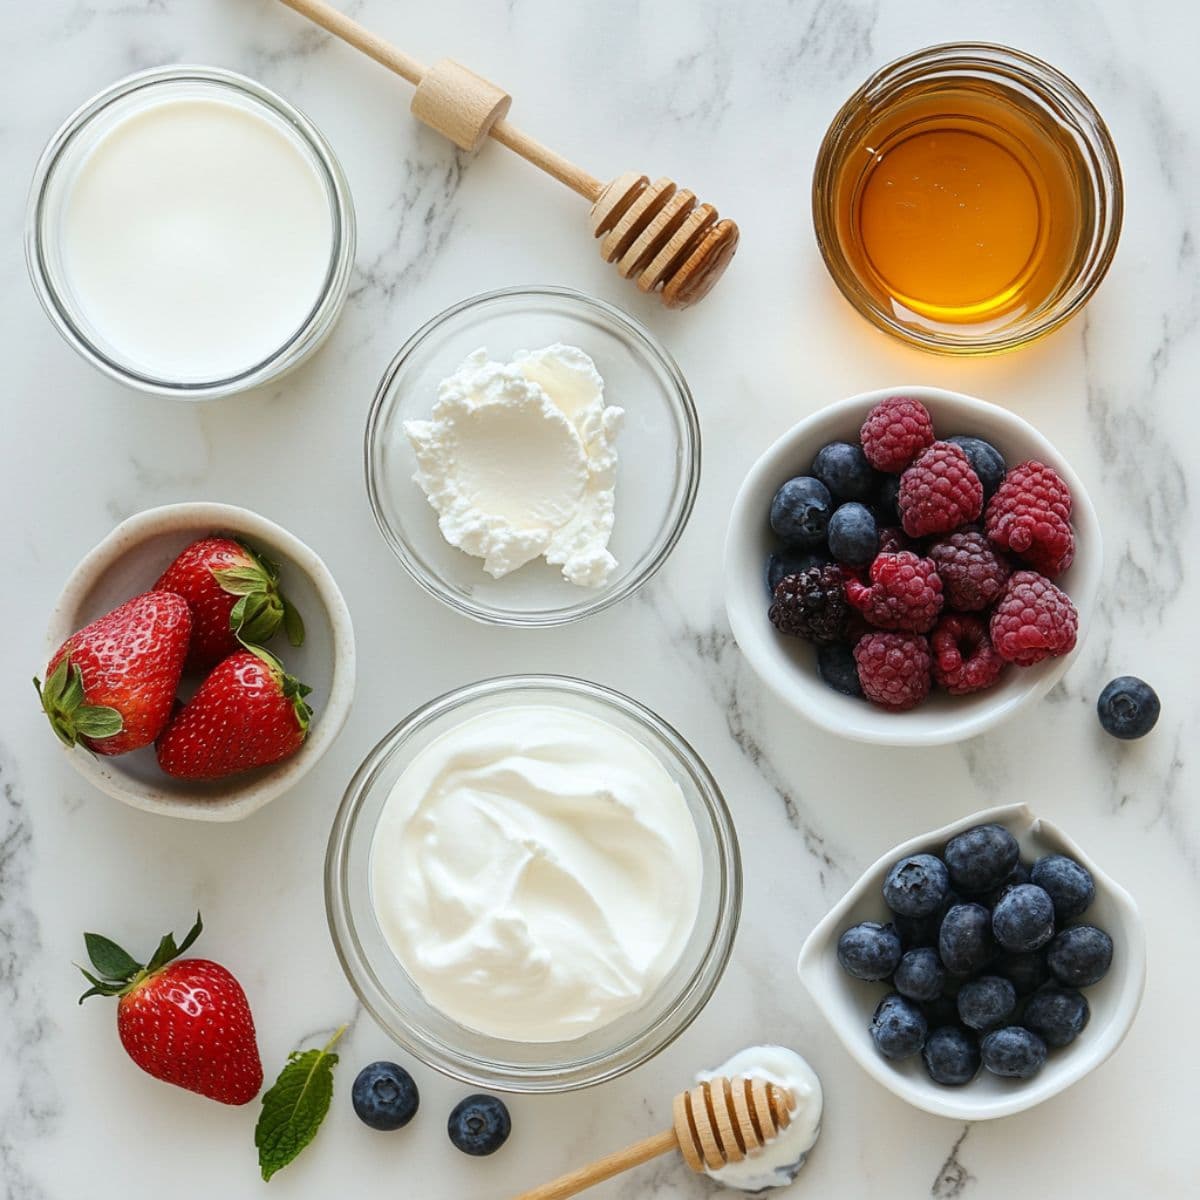
Ninja Creami Recipes Ingredients
The beauty of making frozen treats in my Ninja Creami is how simple the ingredient list can be – just a few quality items transform into something magical. I love opening my freezer to see those perfectly prepared creami pints waiting to become my next favorite dessert, each one holding the promise of creamy, delicious satisfaction with these ninja creami recipes.
Main Ingredients
- Greek yogurt (plain or vanilla)
- Protein powder (vanilla, chocolate, or unflavored)
- Almond milk or milk of choice
- Natural sweeteners (honey, maple syrup, or stevia)
- Heavy cream (for extra richness)
- Vanilla extract
- Fresh or frozen fruit
- Cottage cheese (for high-protein bases)
- Sugar substitutes (monk fruit, erythritol)
Optional Extras
Feel free to add mix-ins like chocolate chips, crushed cookies, or chopped nuts after the initial spin cycle for extra texture. A pinch of xanthan gum can help achieve that perfect scoopable consistency, especially for lower-fat recipes.
Everything you need to make these incredible frozen treats is in the recipe card.
How to Make Ninja Creami Recipes
Creating perfect frozen treats with your Ninja Creami is simpler than you might think, but there are definitely some tricks I've learned that make all the difference. The key is understanding that ninja creami recipes aren't traditional ice cream making – it's about creating the perfect frozen base, then letting the machine work its magic to achieve that incredible creamy texture.
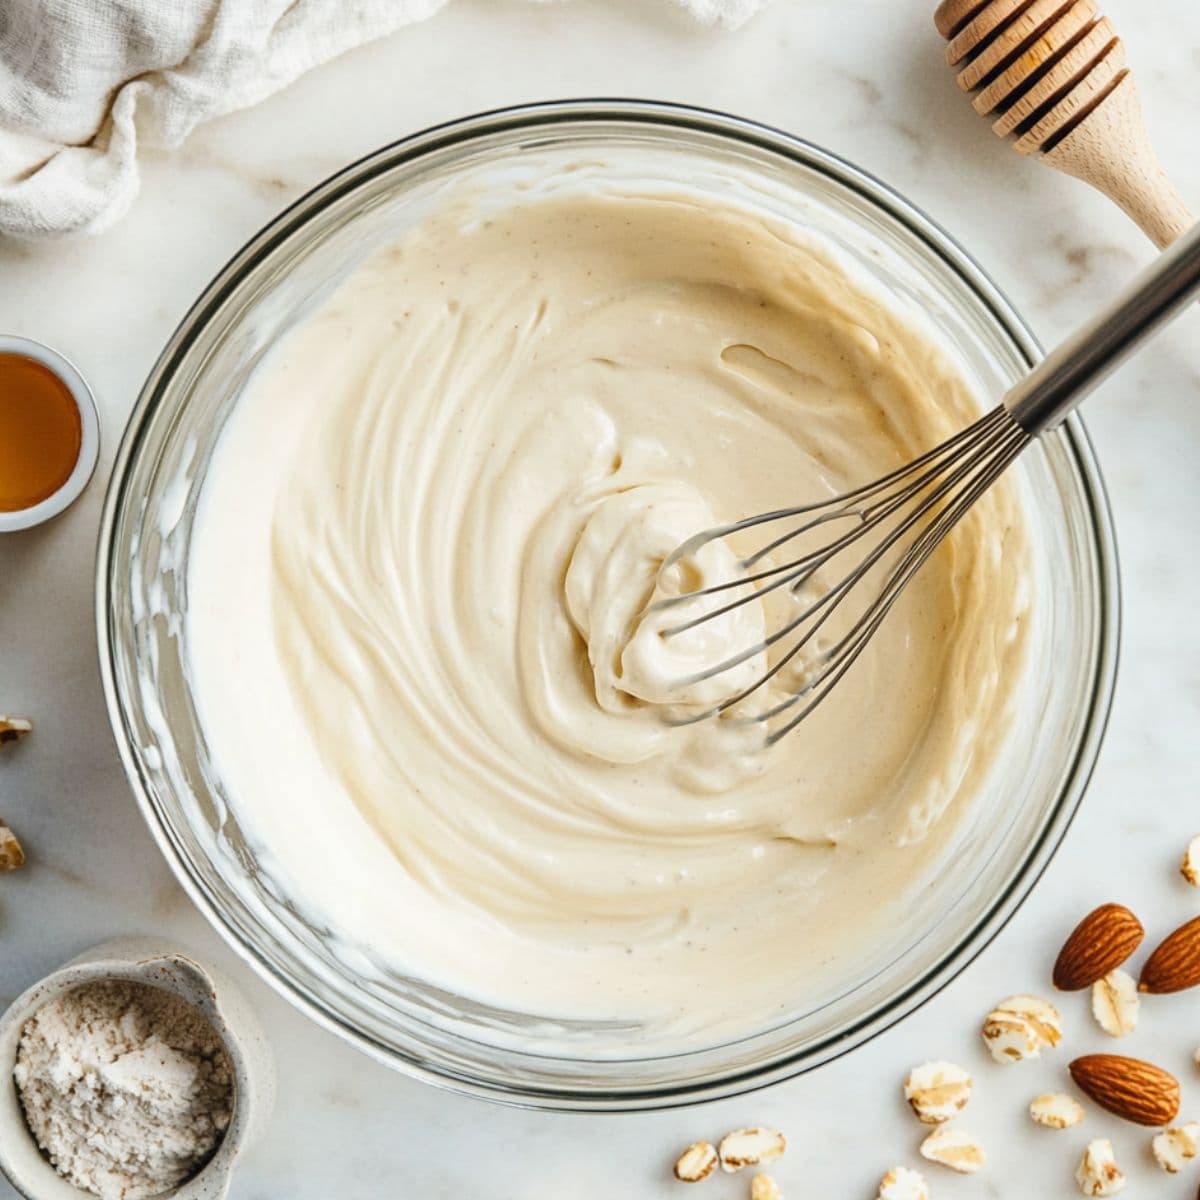
Prepare Your Ice Cream Base
Combine your chosen ingredients in a mixing bowl, whisking thoroughly to ensure everything is well incorporated. For protein ice cream recipes, blend the protein powder completely to avoid any lumps. Pour the mixture into your Ninja Creami pint container, leaving about an inch of space at the top for expansion during freezing.
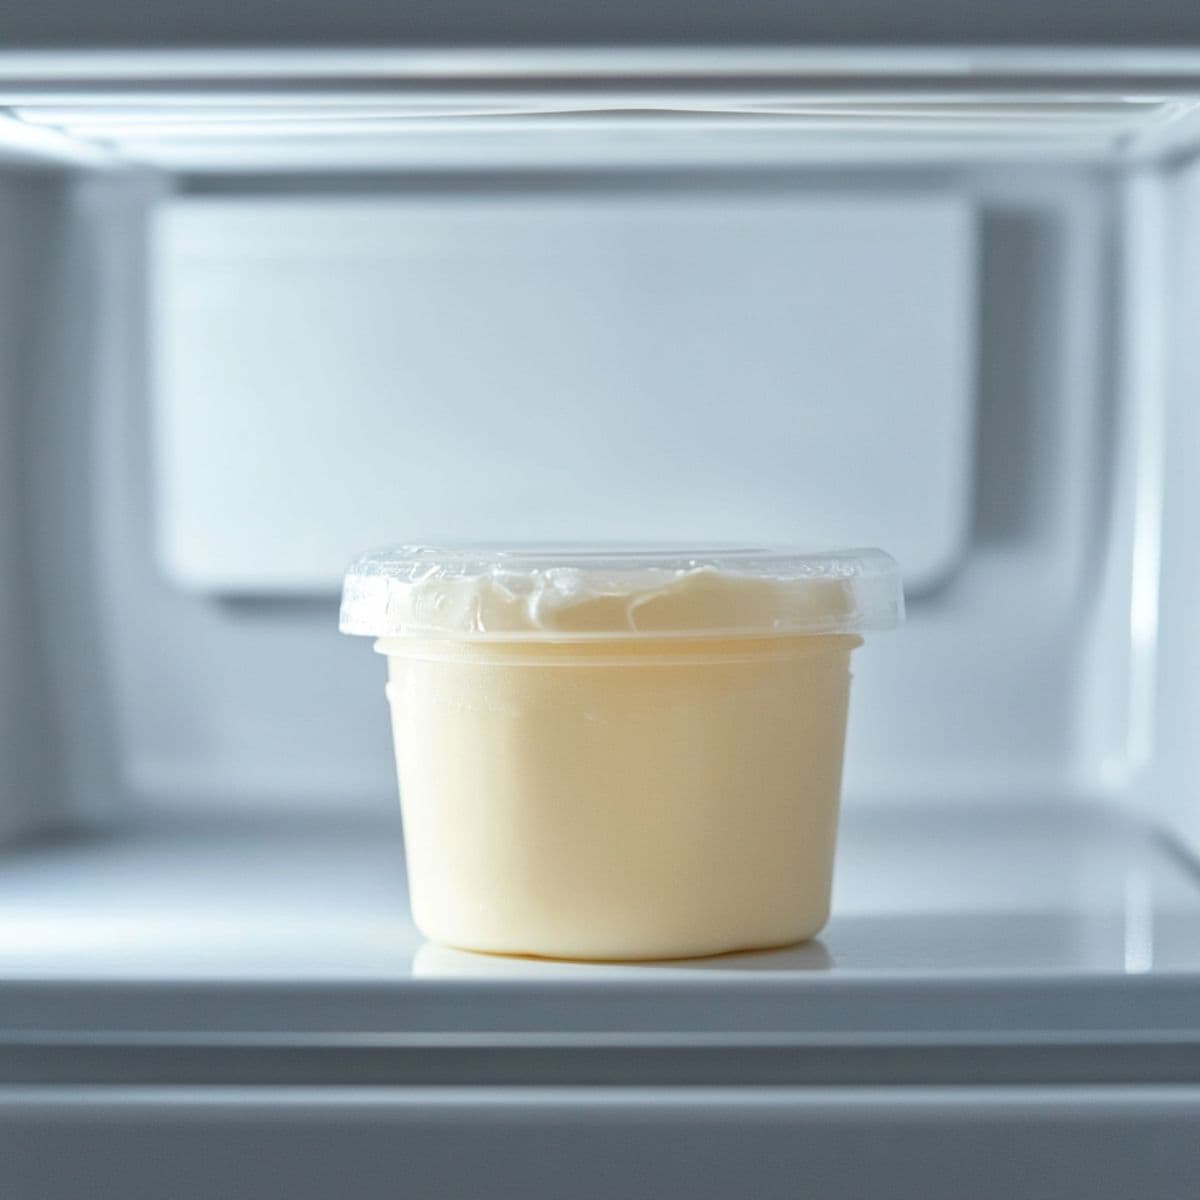
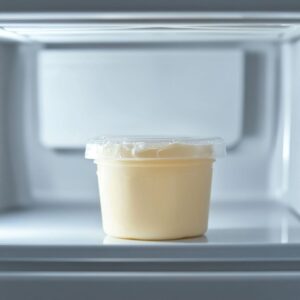
Freeze Your Base Completely
Freeze the filled pint for at least 24 hours – this is crucial for success with ninja creami recipes. The base needs to be completely solid before processing. I typically prepare multiple bases on Sunday for the week ahead. Make sure your freezer is set to proper temperature and the containers are sitting level.
Process with the Spin Cycle
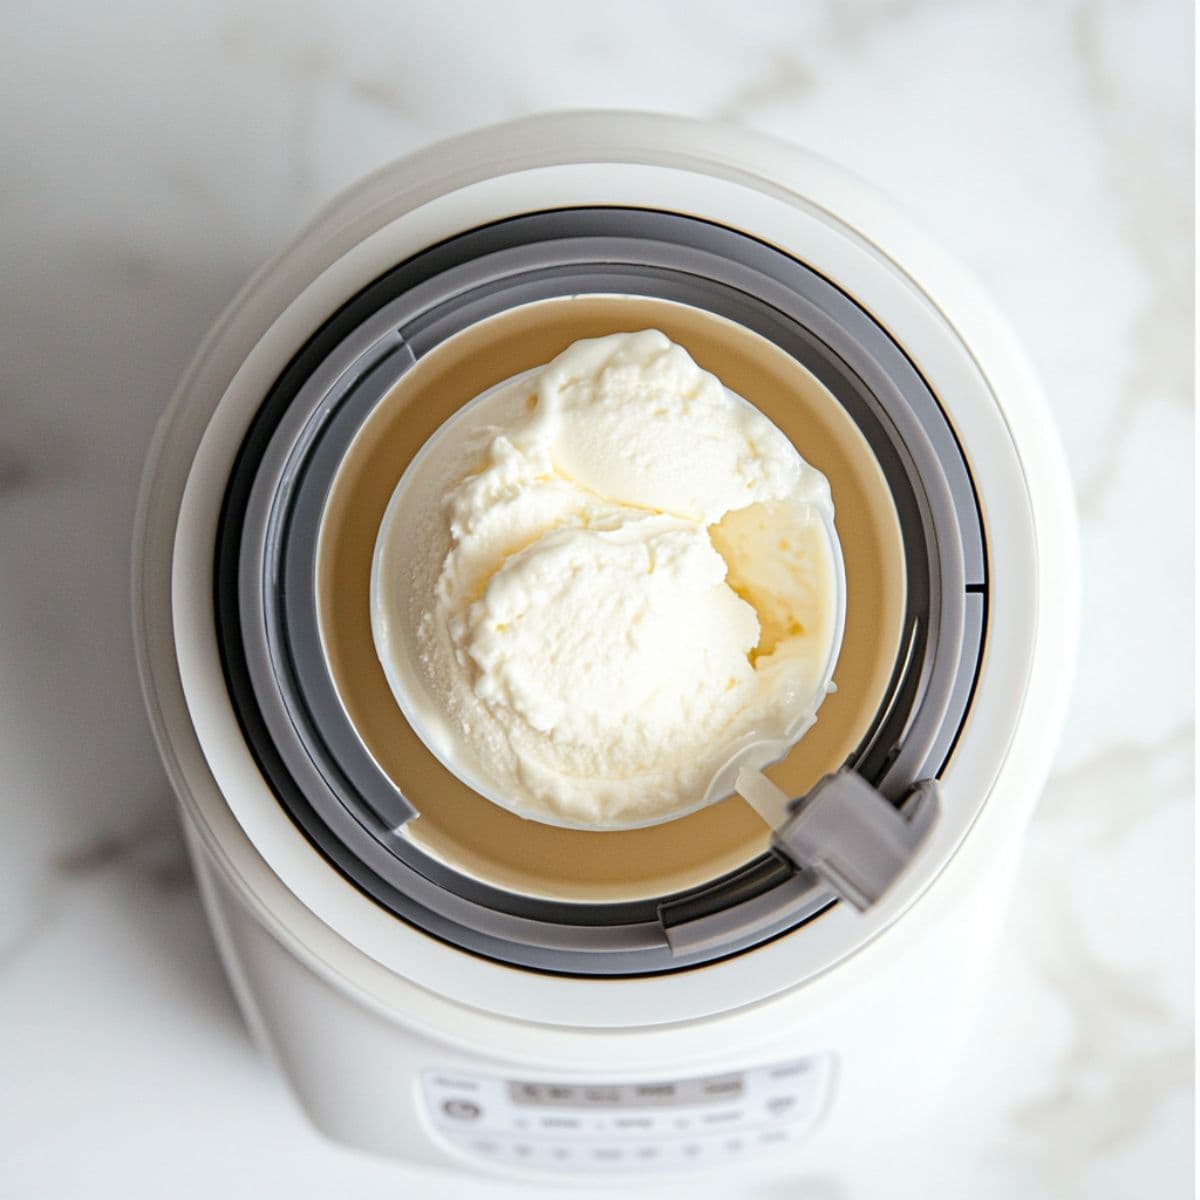
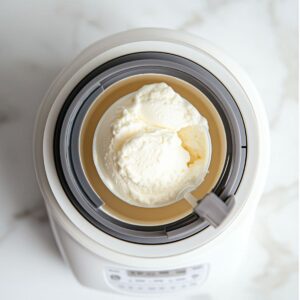
Remove the frozen pint from the freezer and let it sit at room temperature for 5 minutes to slightly soften. Install the blade lid and select the appropriate program – "Ice Cream" for most recipes, "Sorbet" for fruit-based treats, or "Lite Ice Cream" for lower-fat versions. The machine will spin and blend the frozen base into creamy perfection.
Customize and Serve
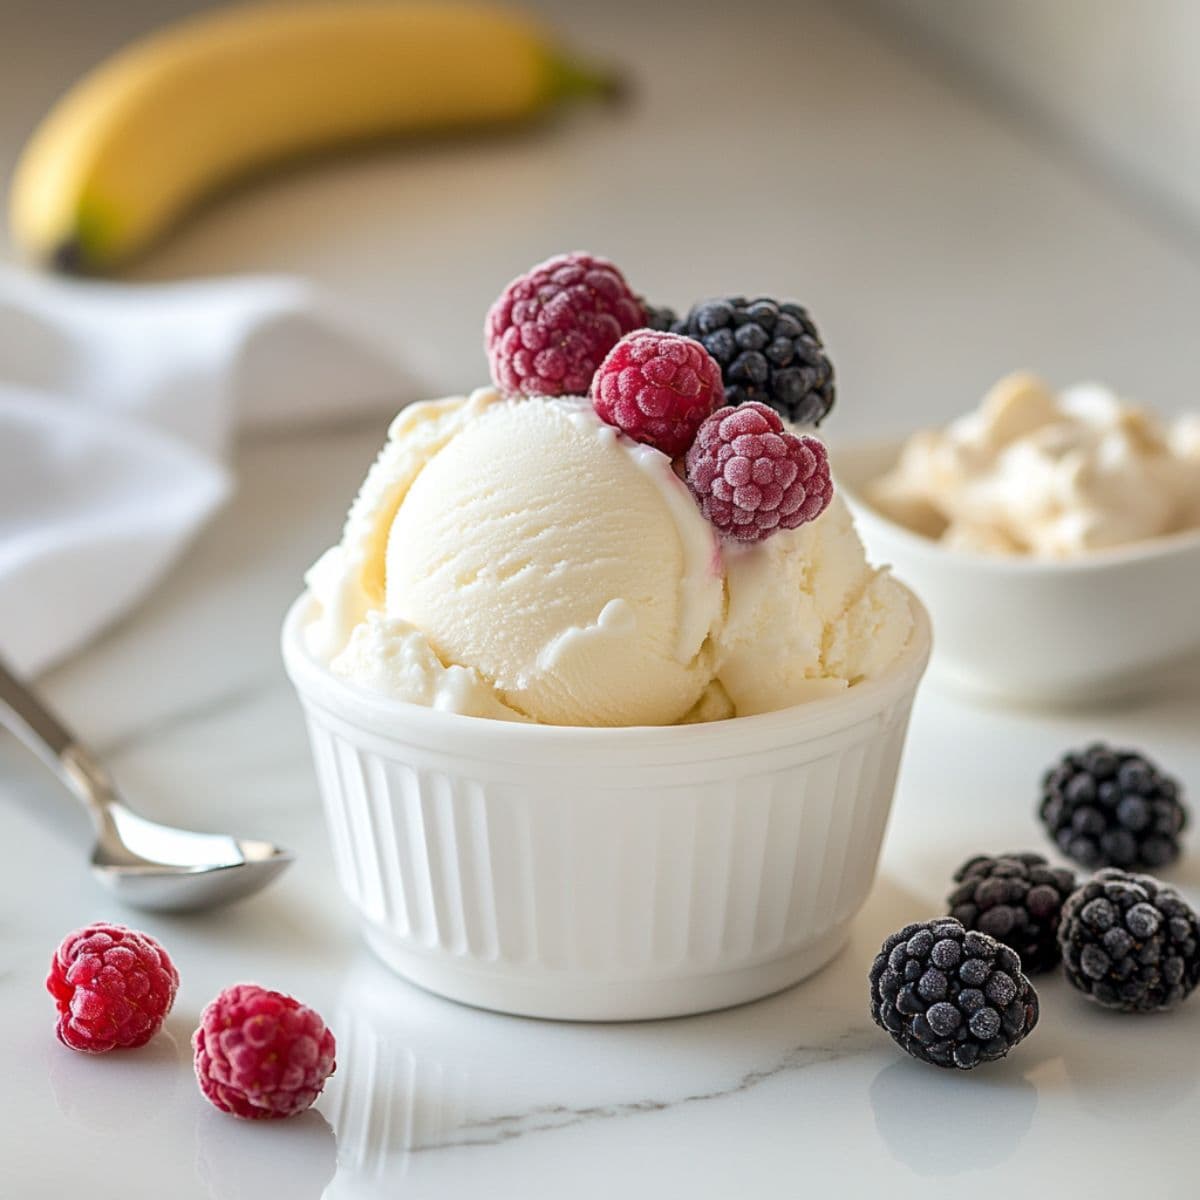
Check the texture after the first spin cycle. If it seems crumbly, select "Re-spin" for a smoother consistency. Now's the time to add any mix-ins using the "Mix-in" program. Enjoy immediately for soft-serve texture, or freeze for 10-15 minutes for firmer scoops that rival traditional ice cream.

Top Tip
After making hundreds of batches in my Ninja Creami, here's the game-changing secret that transformed my ninja creami recipes: always add a tablespoon of vodka or light corn syrup to your base before freezing. I know it sounds unusual, but trust me on this one!
These ingredients prevent the base from freezing rock-solid, making it much easier for the machine to process and resulting in that perfectly smooth, creamy texture every time. The alcohol evaporates during processing, so there's no taste left behind just incredibly scoopable ice cream.
I also discovered that letting your frozen pint sit on the counter for exactly 5 minutes before processing makes all the difference with ninja creami recipes. Too little time and the blade struggles; too long and you'll get soupy results. This simple timing trick has saved me from countless crumbly disappointments and turned every batch into creamy perfection that rivals any premium ice cream shop.
Ingredient Substitutions & Variations
The beauty of ninja creami recipes lies in their incredible flexibility – you can easily adapt them to any dietary preference or ingredient availability. Swap Greek yogurt for cottage cheese base for extra protein, or use coconut milk instead of almond milk for tropical flavors.
For sugar-free options, stevia or monk fruit work perfectly in place of honey. Plant-based protein powder creates delicious dairy-free treats, while adding frozen fruit transforms any base into vibrant sorbet. Low-fat versions still achieve amazing creaminess by adding a touch of xanthan gum to the frozen treat mixture. Each substitution opens up endless flavor possibilities for your Ninja Creami machine.
Storage and Reuse Instructions
These Ninja Creami frozen treats store wonderfully, though with flavors this good, they rarely last long in our house! For best results, store your finished ice cream in the original Creami pint with the lid tightly sealed in the freezer for up to one month. The airtight containers prevent ice crystals from forming and maintain that perfect texture.
If your stored ice cream becomes too hard, simply run it through one "Re-spin" cycle to restore that fresh-made creaminess. For individual portions, I love scooping finished treats into small containers for grab-and-go snacks throughout the week.
Pro tip: keep your prepared bases labeled with dates and flavors – you can freeze unmade bases for up to three months. When ready to enjoy, just thaw slightly and process as usual. This meal prep approach means you're always one spin cycle away from fresh frozen treats. It's like having your own personal ice cream shop at home!
What to Serve With These Ninja Creami Recipes
These ninja creami recipes are incredibly versatile and can be enjoyed in multiple ways throughout the day:
As a Post-Workout Treat:
- Serve your protein ninja creami recipes with fresh berries for antioxidants
- Pair with our homemade granola for added crunch
- Add a drizzle of almond butter for healthy fats
As a Dessert:
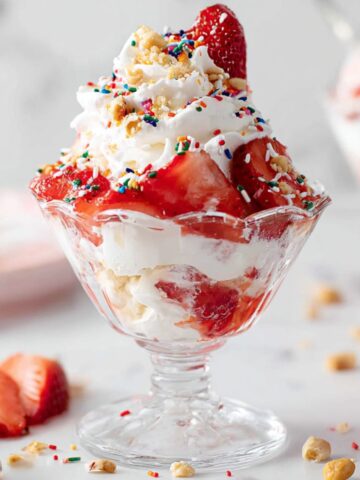
- Top your ninja creami recipes with warm brownies or cookies
- Create an ice cream sundae bar with sugar-free toppings
- Serve alongside fresh mint and dark chocolate shavings
For Special Occasions:
- Build parfaits layering your ninja creami recipes with cake crumbles
- Pair with warm fruit compotes for temperature contrast
- Serve in waffle cones for a fun presentation
For Kids:
- Add colorful sprinkles to make ninja creami recipes more appealing
- Serve with animal crackers for dipping
- Create simple ice cream sandwiches using their favorite cookies
For more frozen treat inspiration, explore these creative ice cream serving ideas that showcase unique presentation styles. You'll also find excellent healthy dessert combinations that pair perfectly with homemade frozen treats from your ninja creami recipes.
Grandmama's Magic Touch
Okay, here's something I've never shared before and honestly, I learned it the hard way after ruining about twelve batches of what should have been amazing ice cream. My neighbor Eleanor, who's basically like a grandmother to me, came over one day and watched me struggle with yet another crumbly mess from my ninja creami recipes.
"Honey, you're overthinking this," she said, laughing at my frustrated face. She grabbed a packet of unflavored gelatin from my pantry (which I had no idea what to do with) and showed me her trick. Just dissolve half a teaspoon in two tablespoons of warm water, let it bloom for a minute, then whisk it into your base before freezing.
I was skeptical – it seemed too simple. But Eleanor was right. That tiny addition creates the most incredible texture, especially with those high-protein ninja creami recipes that used to turn into hockey pucks in my freezer. Now every single batch comes out perfectly smooth and scoopable. Sometimes the simplest solutions really are the best ones.
FAQ
What ingredients do I need to make ice cream in a Ninja Creami?
The basic ingredients are surprisingly simple! You'll need a liquid base like almond milk or Greek yogurt, a sweetener of your choice, and flavor additions like vanilla extract or protein powder. For the creamiest results, I always include some fat – either heavy cream, full-fat yogurt, or even a tablespoon of cream cheese. The beauty is that you can customize based on your dietary needs and preferences.
What else can I use my Ninja Creami for?
Beyond ice cream, your Ninja Creami excels at making sorbet, frozen yogurt, gelato, and even smoothie bowls! I've successfully made protein-packed breakfast bowls, dairy-free nice cream from frozen bananas, and refreshing fruit sorbets. The machine can also create milkshakes from frozen bases – it's incredibly versatile for any frozen treat you can imagine.
Why don't we recommend the Ninja Creami? What are the downsides?
While I absolutely love mine, there are some considerations. The machine requires 24-hour advance planning since bases must freeze completely. It can be quite loud during operation, and the initial investment is significant. Some users find the pint capacity limiting for larger families, and achieving the perfect texture sometimes requires trial and error with different recipes.
How long to freeze Ninja Creami base before spinning?
Always freeze your base for a minimum of 24 hours – this is non-negotiable for proper texture. I've found that 24-48 hours gives the best results, though you can store prepared bases for up to three months. The key is ensuring the base is completely solid throughout before processing.
More Recipes You'll Love
If you enjoyed these ninja creami recipes, you'll absolutely adore our collection of more healthy desserts that bring the same guilt-free satisfaction to your kitchen. For even more frozen treat inspiration, check out our protein smoothie bowls and homemade granola recipes that complement these creamy creations perfectly.
These treats pair beautifully with our homemade protein smoothies or fresh fruit salads. Whether you're meal prepping for the week or need something special for unexpected guests, there's always a perfect healthy dessert waiting to be discovered. Why not bookmark a few more ninja creami recipes for your next frozen treat adventure?
Easy Ninja Creami Recipes
Ingredients
Equipment
Method
- In a mixing bowl, combine your chosen ingredients such as Greek yogurt, protein powder, almond milk, sweetener, and vanilla extract. Whisk thoroughly to ensure everything is fully incorporated1 cup Greek yogurt (plain or vanilla)

- Pour the blended mixture into the Ninja Creami pint container, leaving about 1 inch of space at the top to allow for expansion during freezing.
- Freeze the filled pint container on a level surface for at least 24 hours, ensuring the base is completely solid.
- Remove the pint from the freezer and let it sit at room temperature for 5 minutes. Install the Creami blade lid, place the container in the machine, and select your preferred cycle "Ice Cream," "Sorbet," or "Lite Ice Cream" depending on your recipe.
- After the first cycle, check the texture. If crumbly, use the "Re-spin" setting. Add mix-ins like fruit or chocolate chips using the "Mix-in" program if desired.

- Serve immediately for soft-serve consistency or place back in the freezer for 10–15 minutes for firmer scoops.

Leave a Reply