

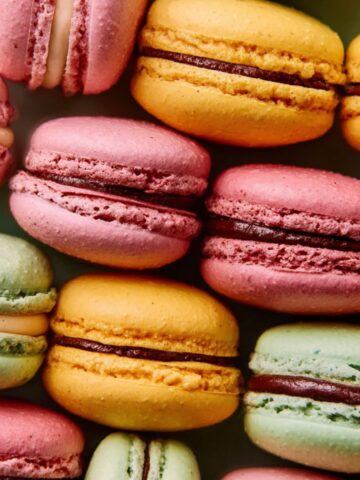
This Butterfinger Cheesecake is the showstopping dessert that makes every celebration special. Creamy cheesecake loaded with crushed Butterfinger candy bars on an Oreo crust, topped with chocolate ganache and more Butterfinger pieces. That's it. Takes about 20 minutes of hands-on time plus chilling and tastes like the ultimate candy bar cheesecake dream. I make this no bake Butterfinger cheesecake whenever I need easy cheesecake recipes that look professionally made but require zero baking skills.


Why You'll Love This Butterfinger Cheesecake Recipe
Real talk, this Butterfinger cheesecake is one of the best butterfinger dessert recipes I've made and everyone begs for the recipe every single time.
What Actually Works: This Butterfinger cheesecake recipe combines a simple Oreo cookie crust with a no-bake cream cheese filling studded with crushed Butterfinger candy bars, all topped with rich chocolate ganache and more candy pieces. Mix the filling, press into the crust, chill until set, then top with ganache. About 20 minutes active time plus 4 hours chilling. Comes out looking like a bakery cheesecake but you didn't even turn on the oven.
Why Other Methods Fail: Most butterfinger cheesecake recipes mess up by overbaking so the cheesecake cracks and gets grainy instead of creamy. Some use too little candy so you lose that essential Butterfinger flavor. Others skip the chocolate ganache topping which is what makes it look professional. Some don't chill long enough so the cheesecake is too soft and won't slice cleanly.
The thing that changed everything: Understanding that you need to CHILL THE CHEESECAKE FULLY for no bake Butterfinger cheesecake that slices cleanly instead of being a goopy mess. My first attempt I was impatient and only chilled it for 2 hours because I wanted to serve it for dinner. The cheesecake was still too soft and wobbly in the center.
Jump to:
- Why You'll Love This Butterfinger Cheesecake Recipe
- What You'll Need for Butterfinger Cheesecake Recipe
- How to Make Butterfinger Cheesecake Recipe
- Top Tip
- Ingredient Substitutions & Variations
- Storage and Reuse Instructions
- What to Serve With Butterfinger Cheesecake Recipe
- My Butterfinger Cheesecake Recipe Journey
- FAQ
- More Recipes You'll Love
- Butterfinger Cheesecake
- Related
- Pairing
What You'll Need for Butterfinger Cheesecake Recipe
Simple ingredients you probably already have. This is the easiest homemade cheesecake you'll make.
For the Oreo Crust
- Oreo cookies, crushed
- Butter, melted
- Sugar

For the Cheesecake Filling
- Cream cheese, softened
- Powdered sugar
- Vanilla extract
- Heavy whipping cream
- Butterfinger candy bars, crushed
- Salt
For the Chocolate Ganache
- Semi-sweet chocolate chips
- Heavy cream
- Crushed Butterfinger for topping
Optional Toppings
- Whipped cream
- Caramel sauce
- Extra Butterfinger pieces
- Chocolate drizzle
Exact measurements in the Recipe card.
How to Make Butterfinger Cheesecake Recipe
This no bake Butterfinger cheesecake comes together in about 20 minutes active time. The technique is simple but chilling time is essential.
Step 1: Make the Oreo Crust
Crush Oreo cookies in a food processor until fine crumbs form, then mix with melted butter and sugar until the mixture resembles wet sand. Press firmly into the bottom of a 9-inch springform pan, using the bottom of a measuring cup to pack it down evenly and create a solid base for your Butterfinger cheesecake that won't fall apart when slicing.
Step 2: Make the Cheesecake Filling
Beat softened cream cheese with an electric mixer on medium speed until smooth and fluffy with no lumps, about 2-3 minutes. Add powdered sugar, vanilla extract, and a pinch of salt, beating until combined. In a separate bowl, whip heavy cream to stiff peaks, then gently fold the whipped cream into the cream cheese mixture along with crushed Butterfinger candy bars until just combined for light and creamy no bake Butterfinger cheesecake filling.
Step 3: Chill the Cheesecake
Pour the cheesecake filling over the Oreo crust, spreading it evenly with a spatula and smoothing the top. Cover the pan tightly with plastic wrap and refrigerate for at least 4-6 hours or overnight until the filling is completely set and firm to the touch, which is essential for clean slicing of your recipe for Butterfinger cheesecake.
Step 4: Make the Chocolate Ganache
Heat heavy cream in the microwave until just starting to bubble, about 1 minute, then pour over chocolate chips in a bowl. Let sit for 2 minutes undisturbed, then whisk until smooth and glossy. Let the ganache cool for 5-10 minutes until slightly thickened but still pourable for perfect coverage on your Butterfinger cheesecake.
Step 5: Top and Serve
Pour the chocolate ganache over the chilled cheesecake, spreading it to the edges with an offset spatula so it drips down the sides slightly. Immediately sprinkle crushed Butterfinger pieces over the ganache before it sets for decoration. Refrigerate for another 30 minutes to set the ganache, then run a knife around the edge and release the springform pan.

Slice with a hot knife wiped clean between cuts for perfect slices of your no bake Butterfinger cheesecake.
Top Tip
Chill the cheesecake for at least 4-6 hours until completely firm for clean slices:
- Proper chilling is what makes this Butterfinger cheesecake work
- Made this mistake by only chilling for 2 hours
- The cheesecake was still soft and wobbly in the center
- Tried to slice it and the knife just smashed through
- The slices fell apart into mushy puddles on the plate
- Started chilling for a full 4-6 hours or overnight
- The cheesecake became completely firm and set
- Suddenly got perfect slices with clean straight edges
- Each slice held its shape beautifully without falling apart
- The texture was creamy but firm enough to eat with a fork
Ingredient Substitutions & Variations
The base Butterfinger cheesecake recipe is perfect but you can customize for different candy bar flavors.
Snickers Cheesecake Version
Use crushed Snickers bars instead of Butterfinger for Snickers cheesecake with chocolate, caramel, and peanut flavors. Add extra caramel sauce drizzled over the top. This variation appeals to people who prefer Snickers to Butterfinger while keeping the same easy no-bake cheesecake method.
Caramel Butterfinger Cheesecake Style
Add caramel sauce swirled into the filling and drizzled over the top for caramel Butterfinger cheesecake that's extra indulgent. Layer caramel between the filling and ganache. The caramel complements the peanut butter flavor in the Butterfinger candy perfectly for ultimate richness.
Butterfinger Cheesecake Bars
Make in a 9x13 pan and cut into squares for Butterfinger cheesecake bars that serve a crowd. These are perfect for potlucks and parties. The bar format makes this recipe for Butterfinger cheesecake even easier to transport and serve at gatherings.
Storage and Reuse Instructions
Yeah, Butterfinger cheesecake keeps great in the fridge actually.
Refrigerator: Store leftover no bake Butterfinger cheesecake covered tightly with plastic wrap or in an airtight container for up to 5 days. The cheesecake stays fresh and creamy. Keep refrigerated at all times since it's not baked and contains cream cheese that needs to stay cold.
Freezing: This Butterfinger cheesecake freezes beautifully for up to 2 months. Freeze whole or in slices wrapped tightly in plastic wrap then foil. Thaw overnight in refrigerator before serving. The texture stays perfect even after freezing, making this ideal for make-ahead desserts.
Make-Ahead: This is the perfect make-ahead dessert for parties. Make the cheesecake 1-2 days before serving and keep refrigerated. Add the ganache and Butterfinger topping the day of serving for freshest appearance. The no bake method makes this recipe for Butterfinger cheesecake stress-free for entertaining.
Serving: Serve this Butterfinger cheesecake cold straight from the refrigerator. Let it sit at room temperature for 5-10 minutes before slicing for easiest cutting. Top each slice with whipped cream if desired for extra indulgence.
What to Serve With Butterfinger Cheesecake Recipe
This Butterfinger cheesecake is a complete dessert but pairs nicely with simple accompaniments.
Classic Pairings
Serve with fresh whipped cream, vanilla ice cream, or a drizzle of caramel sauce. Hot coffee or espresso cuts through the richness perfectly. These classic cheesecake desserts accompaniments let the Butterfinger flavor shine without overwhelming it.
Party Presentation
Arrange slices on individual dessert plates with a dusting of cocoa powder and extra Butterfinger pieces. Add fresh berries for color contrast. Serve with champagne or dessert wine for elegant occasions. This no bake Butterfinger cheesecake looks professionally made with minimal effort.
Casual Serving
Serve directly from the springform pan on a cake stand with a pie server. Let guests help themselves buffet-style. Provide small plates and forks. This works perfectly for casual gatherings where the Butterfinger cheesecake is the star dessert.
My Butterfinger Cheesecake Recipe Journey
First time I made Butterfinger cheesecake I was excited to serve it for a dinner party. Recipe said to chill for 4-6 hours but I only had 2 hours before guests arrived. Figured 2 hours would be enough.
When it was time to serve, the cheesecake looked perfect. Started slicing and the knife just smashed straight through the soft center. The filling was still wobbly and not fully set.
The slices fell apart into mushy puddles on the plates instead of standing up with clean edges. My guests were polite but the presentation was terrible. I was so embarrassed.
Started researching and learned that no-bake cheesecakes need the full chilling time. Made another one the day before and let it chill overnight for a full 8 hours.
The difference was incredible. The cheesecake was completely firm and set. When I sliced it, the knife cut clean straight lines. Each slice held its shape perfectly with beautiful straight edges.
My family who'd seen the mushy first version couldn't believe this was the same recipe. Now I always make this Butterfinger cheesecake at least one day ahead so it has plenty of time to chill and set completely.
Similar Easy No-Bake Dessert Recipes Worth Making
Oreo Cheesecake: Classic no-bake cheesecake with Oreo cookies throughout for simple crowd-pleasing dessert that everyone loves.
Peanut Butter Pie: Creamy peanut butter filling in graham cracker crust with chocolate topping for easy no-bake dessert ready in minutes plus chilling.
Chocolate Mousse: Light and airy chocolate dessert that's elegant but simple, perfect for dinner parties when you want something impressive without baking.
FAQ
Why was Butterfinger discontinued?
Butterfinger candy bars were not discontinued. They underwent a recipe change in 2019 when Ferrero bought the brand from Nestlé. The new recipe has a different chocolate coating and slightly different peanut butter center, but Butterfinger bars are still widely available. You can use them in this Butterfinger cheesecake recipe just like always.
What is a Dolly Parton cheesecake?
Dolly Parton cheesecake is a specific recipe that Dolly Parton shared, which is different from Butterfinger cheesecake. This no bake Butterfinger cheesecake uses cream cheese, whipped cream, and crushed Butterfinger candy bars. It's not related to Dolly Parton's version but is equally delicious for candy bar lovers.
Why are Butterfingers not as good anymore?
Some people think Butterfingers changed after Ferrero bought the brand in 2019 and reformulated the recipe. The new version has different chocolate and slightly different texture. However, they still work perfectly in this recipe for Butterfinger cheesecake. The creamy filling complements the candy regardless of the exact formula.
What's the crunchy stuff in a Butterfinger?
The crunchy stuff in a Butterfinger is crispy peanut butter layers. It's made from ground roasted peanuts combined with sugar and corn syrup, then layered and coated in chocolate. This crispy peanut butter texture is what makes Butterfinger unique and perfect for adding crunch to this no bake Butterfinger cheesecake filling.
More Recipes You'll Love
Once you've mastered this Butterfinger Cheesecake, try my Creamy Tomato Garlic Pasta for an easy weeknight dinner with rich tomato cream sauce ready in 20 minutes. My Street Corn Chicken Bowl brings fresh Mexican-inspired flavors with charred corn and grilled chicken. And my Cheesy Potato Burritos deliver comfort food with crispy tater tots and melted cheese wrapped in warm tortillas for satisfying meals the whole family loves.
Butterfinger Cheesecake
Ingredients
Equipment
Method
- Crush Oreos in food processor until fine crumbs form. Mix with melted butter and sugar until mixture resembles wet sand. Press firmly into bottom of 9-inch springform pan using bottom of measuring cup to pack down evenly.
- Beat cream cheese with electric mixer until smooth and fluffy, 2-3 minutes. Add powdered sugar, vanilla, and salt, beating until combined. Whip heavy cream to stiff peaks in separate bowl, then fold into cream cheese mixture along with crushed Butterfinger bars until just combined.
- Pour filling over crust, spread evenly with spatula and smooth top. Cover tightly with plastic wrap and refrigerate 4-6 hours or overnight until completely set and firm to the touch.
- Heat heavy cream until just bubbling, about 1 minute. Pour over chocolate chips in bowl. Let sit 2 minutes undisturbed, then whisk until smooth and glossy. Cool 5-10 minutes until slightly thickened but still pourable.
- Pour ganache over chilled cheesecake, spread to edges with offset spatula. Immediately sprinkle crushed Butterfinger over ganache before it sets. Refrigerate 30 minutes to set ganache. Run knife around edge and release springform. Slice with hot knife wiped clean between cuts.

Nutrition
Notes
Tried this recipe?
Let us know how it was!Related
Looking for other recipes like this? Try these:


Pairing
These are my favorite dishes to serve with Butterfinger Cheesecake:


Leave a Reply