

Here's what nobody tells you about making dynamite chicken buns - I ruined three batches in one week creating soggy disasters or burnt coating with raw chicken inside. Fried too hot, didn't press the panko firmly, made weak sauce. Spent two years failing before a dinner party disaster forced me to learn proper technique. The secret isn't complicated - firm breading, steady 350°F oil temperature, and balanced dynamite sauce. Now my dynamite chicken buns turn out crispy and perfect every time.


Why You'll Love This Dynamite Chicken Buns Recipe
Making spicy dynamite chicken buns solved my biggest party anxiety - needing a crowd-pleaser that looks impressive but doesn't require chef-level skills or hours of prep work.
What Actually Works: This easy dynamite chicken buns recipe produces incredibly crispy chicken with addictive spicy-creamy sauce because you bread it properly and control your oil temperature. The homemade dynamite sauce creates that sweet-spicy-tangy flavor everyone craves from fusion restaurants. My best friend, who's tried every fried chicken spot in town and judges sandwiches ruthlessly, ate four of these dynamite chicken sliders at my last game day party. Works whether you're feeding two people or a crowd of twenty.
Why Other Methods Fail: Most dynamite chicken recipe tutorials skip the proper breading technique or fry at wildly inconsistent temperatures, creating greasy, soggy coating. Some make bland sauce that's just mayo and sriracha with no depth. This baked dynamite chicken buns approach (you can bake or fry) teaches proper breading that stays crispy, oil temperature control for perfect golden chicken, and a sauce with real flavor complexity.
The thing that changed everything: realizing that dynamite chicken sandwiches success has nothing to do with expensive ingredients and everything to do with proper breading technique and temperature control. Started actually pressing that panko into the chicken and stopped guessing at oil temperature. Success rate jumped from maybe 30% to basically guaranteed.
Jump to:
- Why You'll Love This Dynamite Chicken Buns Recipe
- What You'll Need for Dynamite Chicken Buns
- How to Make Dynamite Chicken Buns
- Top Tip
- Ingredient Substitutions & Variations
- Storage and Reuse Instructions
- What to Serve With Dynamite Chicken Buns
- What I Learned the Hard Way
- FAQ
- More Recipes You'll Love
- Dynamite Chicken Buns
- Related
- Pairing
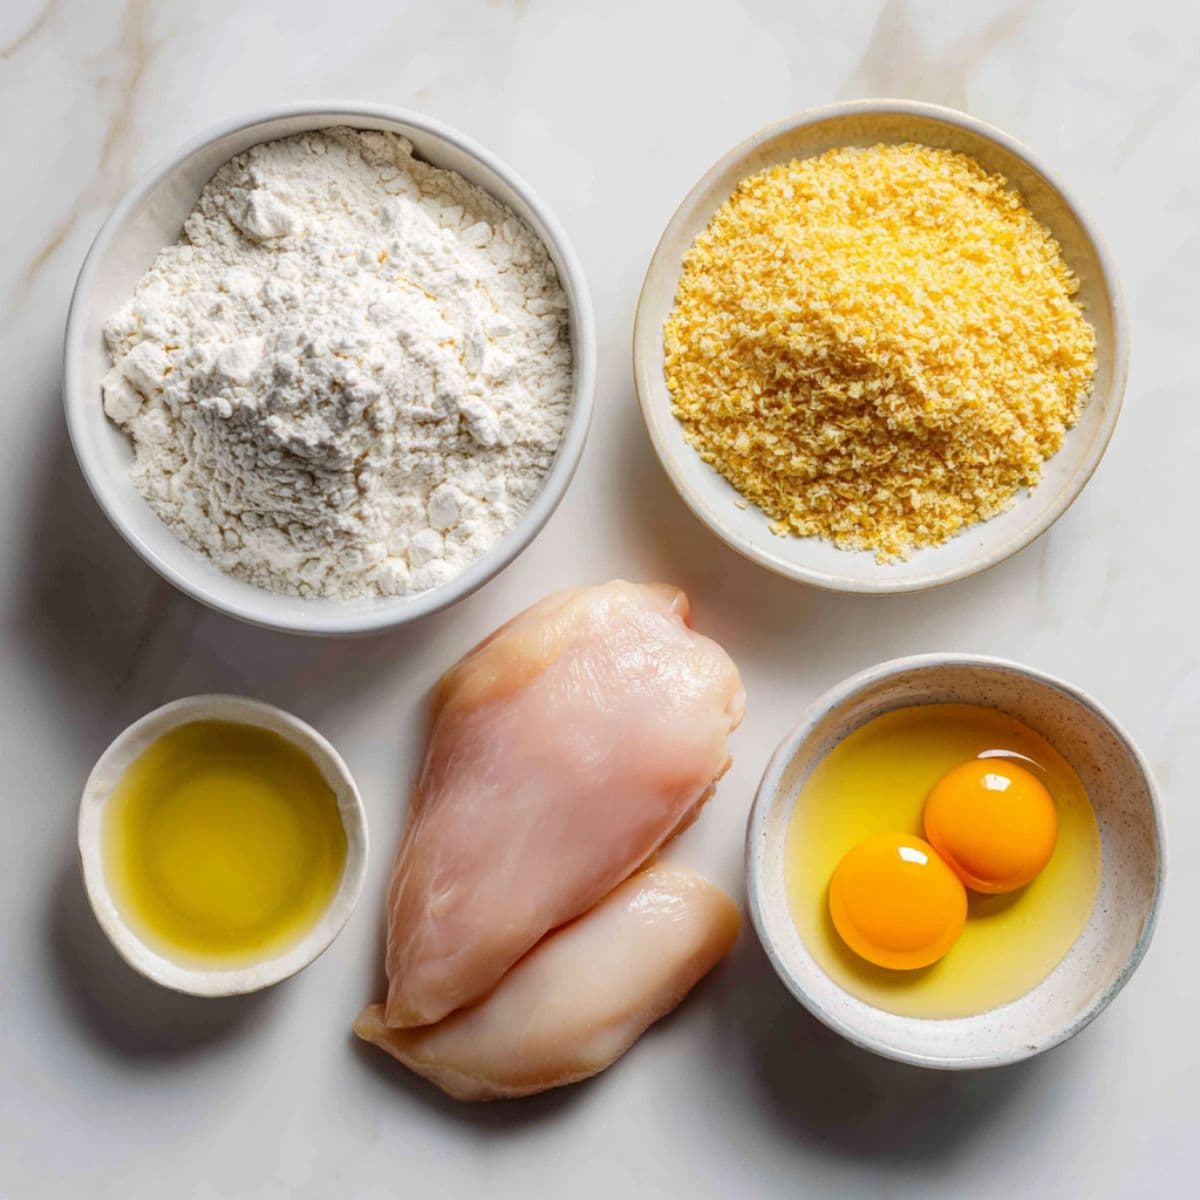
What You'll Need for Dynamite Chicken Buns
This best dynamite chicken buns recipe uses straightforward ingredients available at any grocery store. No hunting for specialty items or Asian market shopping required.
Good chicken breast makes a difference - pound them thin and even for consistent cooking. Panko breadcrumbs create that signature crispy texture regular breadcrumbs can't match.
Main Ingredients
- Chicken breast
- All-purpose flour
- Eggs
- Panko breadcrumbs
- Vegetable oil
Flavor Builders
- Garlic powder
- Onion powder
- Paprika
- Salt and black pepper
- Mayonnaise
- Sriracha or hot sauce
- Sweet chili sauce
- Honey
- Fresh garlic
- Lime juice
Finishing Touches
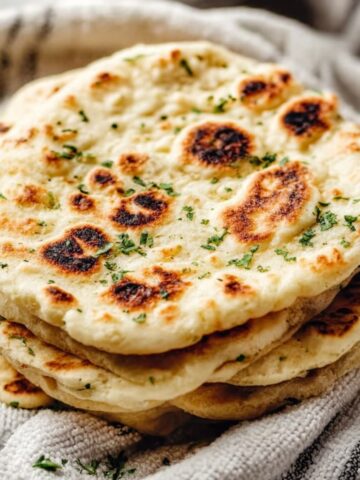
- Soft slider buns or rolls
- Lettuce leaves
- Cucumber slices
- Pickles
- Cheese slices for cheesy dynamite chicken buns
You'll find exact amounts in the recipe card.
How to Make Dynamite Chicken Buns
This crispy dynamite chicken sliders technique is about building proper coating and controlling heat instead of just throwing chicken in hot oil and hoping for the best. Each step matters because it affects the final texture and flavor.
Prepare the chicken properly first
- Pat chicken breasts completely dry with paper towels - wet chicken won't bread well
- Pound each breast to ½-inch even thickness using a meat mallet
- Season generously with salt and pepper on both sides
- Let sit at room temperature for 15 minutes before breading
- Don't skip this step or your dynamite chicken buns will cook unevenly
- Proper preparation creates the foundation for crispy coating
Set up your breading station right
- Arrange three shallow dishes in a row for assembly line efficiency
- Mix flour with half the garlic powder, onion powder, and paprika in dish one
- Beat eggs with splash of water in dish two
- Combine panko with remaining spices in dish three
- Coat each chicken piece: flour first (shake excess), then egg (let drip), then panko
- Press panko firmly into both sides - really press it in
- The pressing step is critical for coating that stays on during frying
Make the dynamite sauce with balance
- Whisk together mayonnaise, sriracha, sweet chili sauce, and honey
- Add minced fresh garlic and lime juice for brightness
- Start with less sriracha and taste - you can always add more heat
- Let flavors meld for 10 minutes while chicken rests
- This homemade dynamite sauce should taste sweet, spicy, tangy, and creamy all at once
- Make it the night before if possible for even better flavor
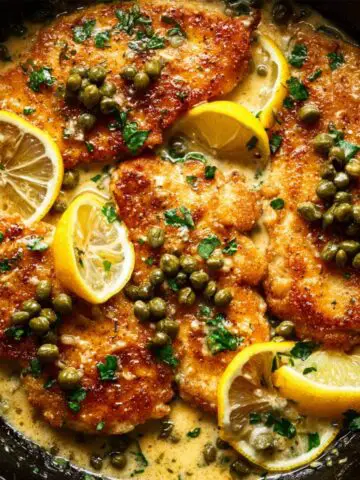
Fry to crispy perfection with temperature control
- Heat ½ inch oil in large skillet to exactly 350°F using a thermometer
- Test with bread cube - should sizzle and brown in 60 seconds
- Fry only 2-3 pieces at a time without crowding the pan
- Cook 4-5 minutes per side until deep golden and internal temp hits 165°F
- Transfer to wire rack, never paper towels which make bottoms soggy
- Monitor oil temperature constantly and adjust heat to maintain 350°F
- Don't rush this step - steady temperature is what creates crispy fried chicken pieces
Air Fryer Option: Spray breaded chicken with oil, air fry at 400°F for 10-12 minutes flipping halfway for baked dynamite chicken buns with less oil.
Assemble with fresh components
- Toast buns lightly for structure that won't get soggy
- Spread generous dynamite sauce on both sides
- Layer crisp lettuce, hot fried chicken, cucumber, pickles
- Add cheese slice for cheesy dynamite chicken buns if using
- Top with more sauce and serve immediately while chicken is hot

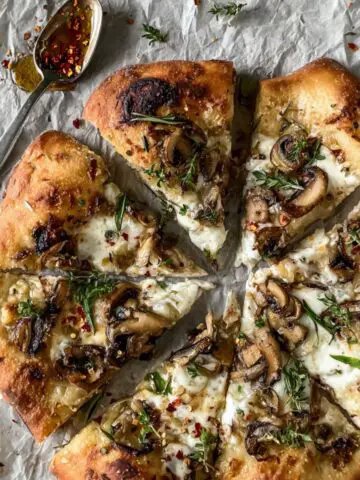
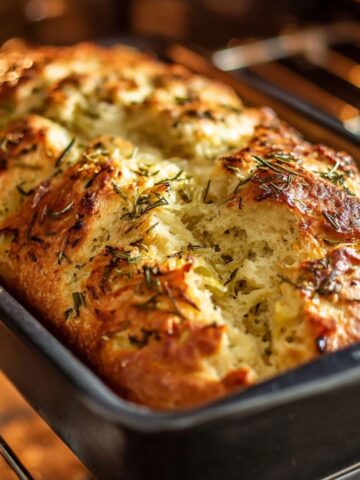
Should have shatteringly crispy chicken coated in addictive spicy-creamy sauce with cool, crunchy vegetables when your dynamite chicken sliders are done right.
Top Tip
Stop frying your dynamite chicken buns at random temperatures just eyeballing the heat. I'm serious. Spent months cranking the burner to high and throwing chicken in whenever the oil looked hot. Just creates burnt coating with raw centers or pale, greasy disasters because you're not controlling anything.
And actually press that panko coating in firmly. A light dusting doesn't cut it. You need to really press those breadcrumbs into the chicken on both sides like you mean it. That compressed coating is what stays attached during frying and gets incredibly crispy in your crispy dynamite chicken sliders.
Buy a $15 thermometer and use it every time. Keep that oil at 350°F no matter what. Too hot burns the outside before the inside cooks. Too cool makes greasy, oil-logged chicken. Steady 350°F is the magic number I learned after ruining countless batches.
Ingredient Substitutions & Variations
Real life means working with what's in your kitchen instead of making store runs for every ingredient. No chicken breast? Thighs work beautifully and stay even juicier with this dynamite chicken recipe method. Out of panko? Regular breadcrumbs work okay but won't get as crispy.
For different flavor directions in your spicy dynamite chicken buns experiments, add gochujang to the sauce for Korean heat, use wasabi mayo instead for sushi-bar vibes, or mix in minced jalapeños for fresh pepper bite. The core technique stays the same - proper breading, controlled temperature - regardless of variations.
You can make air fryer dynamite chicken buns using the air fryer function at 400°F, or go traditional with pan-frying in oil. Some people skip buns entirely and use the chicken cutlets as the actual "buns" for low-carb dynamite chicken filling sandwiches.
Try cheesy dynamite chicken buns by adding pepper jack, mozzarella, or American cheese right after frying. The residual heat melts it perfectly without needing extra steps.
Storage and Reuse Instructions
This party-ready fusion recipe keeps in the fridge for three days if you store components separately. Keep fried chicken in airtight container, sauce in another container, buns and vegetables separate. The chicken loses crispiness but still tastes great.
Reheat chicken in 400°F oven or air fryer for 5-7 minutes to restore some crispiness. Never microwave or you'll get sad, soggy chicken that tastes steamed.
Freeze cooked chicken (without sauce or toppings) for up to two months. Freeze in single layer until solid, then transfer to freezer bags. Reheat from frozen in 375°F oven for 15-20 minutes.
Leftover dynamite chicken sandwiches that are fully assembled won't be crispy the next day, but chop them up for amazing fried rice or grain bowls with extra dynamite sauce drizzled over top.
What to Serve With Dynamite Chicken Buns
This rich, indulgent fusion food pairs best with simple sides that won't compete for attention. Crispy French fries or waffle fries are perfect for scooping up extra spicy mayo sauce. Sweet potato fries add nice sweet-savory contrast.
For lighter balance with your dynamite chicken sliders, Asian-style coleslaw with rice vinegar dressing cuts through the richness. Cucumber salad with sesame seeds stays cool and refreshing. Simple side salad with ginger-sesame dressing works great too.
Corn on the cob with chili-lime butter fits the fusion vibe perfectly. Grilled vegetables like zucchini and bell peppers add color and nutrition without heaviness.
For parties, set up a "build your own dynamite chicken buns" bar with different cheeses, pickles, jalapeños, cucumber, various sauces, and both soft buns and lettuce cups. Everyone loves customizing their own dynamite chicken sandwiches.
What I Learned the Hard Way
Two years ago, I couldn't make dynamite chicken buns without creating either burnt coating with raw chicken or greasy, pale disasters that fell apart. Every attempt ended badly - coating that slid off during frying, sauce that tasted like plain mayo, chicken that was dry inside.
Worst failure happened at a small dinner party when I'd promised "restaurant-quality fusion food" to four friends. Second time making dynamite chicken sliders, figured I had it figured out. Massively wrong. Didn't press the panko firmly so half of it fell off in the oil - huge mistake. Oil temperature was all over the place because I didn't use a thermometer. Made sauce with just mayo and sriracha so it tasted one-dimensional and boring. Served half-breaded chicken that looked pathetic with weak sauce. Watched my best friend take one polite bite, smile, and say "it's interesting" which is code for "what happened here?"
Spent the next two weeks researching what makes food truck crispy dynamite chicken actually work. Discovered that pressing the panko coating isn't optional - it's what makes it stay attached and get crispy. That oil temperature control isn't perfectionism - it's chemistry that cooks chicken through while crisping the coating. That the sauce needs layering - sweet chili sauce for complexity, honey for balance, lime for brightness, fresh garlic for punch.
Started making test batches every weekend. Learned to pound chicken evenly, press that panko in hard, and maintain exactly 350°F with a thermometer - game changer. Made them again for the same friends three months later. My best friend looked at me with wide eyes and said "THESE are what you've been talking about!" Redemption never tasted so good.
Now I make these dynamite chicken buns twice a month and they're always crispy and flavorful. Turns out the gap between disaster and success was just following proper technique instead of winging it and hoping for the best.Retry
FAQ
Can you make dynamite chicken buns ahead of time?
You can prep components separately ahead for easy dynamite chicken buns recipe success. Make the homemade dynamite sauce up to three days early - flavors actually improve as they meld. Bread the chicken the night before and refrigerate uncovered, which helps the coating stick better. Slice vegetables and store in containers with damp paper towels. When ready to serve, just fry or bake the chicken and assemble. Fully assembled dynamite chicken sandwiches get soggy quickly, so always assemble fresh right before serving. The breading-ahead trick makes day-of cooking much faster for your spicy dynamite chicken buns. Check this guide to prepping chicken dishes ahead.
What makes dynamite sauce "dynamite"?
The "dynamite" in dynamite chicken buns comes from the spicy-creamy sauce that has explosive flavor - not literally dynamite. Traditional dynamite sauce combines mayonnaise base with sriracha or hot sauce for heat, sweet chili sauce for complexity, and balancing ingredients like honey, garlic, and lime juice. The name likely comes from Japanese "dynamite rolls" which use similar spicy mayo. The sauce should taste simultaneously creamy, spicy, sweet, tangy, and garlicky. Some versions add gochujang, wasabi, or other heat sources. The key is balance - not just hot, but layered flavor that makes every bite addictive in your creamy dynamite chicken sliders. Learn more about Asian fusion sauce techniques.
Can you bake dynamite chicken buns instead of frying?
Yes, baked dynamite chicken buns work great and reduce oil significantly. Place breaded chicken on greased baking sheet, spray generously with cooking spray, and bake at 425°F for 20-25 minutes flipping halfway until golden and 165°F internal temperature. The coating won't get quite as shatteringly crispy as fried versions, but you still get good crunch and amazing flavor. Air fryer works even better - cook at 400°F for 10-12 minutes flipping once. The air fryer dynamite chicken buns method gives you closer to fried texture with minimal oil. Either way, proper breading technique matters more than cooking method for crispy chicken success.
What toppings go on chicken bao buns?
Traditional chicken bao buns and dynamite chicken buns share similar topping principles. For dynamite chicken sandwiches, crisp lettuce (iceberg or romaine) adds crunch, thinly sliced cucumbers provide cool freshness, pickles give tangy bite, and plenty of that spicy mayo sauce ties everything together. You can add jalapeño slices for extra heat, shredded carrots for color, cilantro for herbal notes, or green onions for sharp bite. The key is balancing rich crispy fried chicken pieces with cool, crunchy vegetables. Some people add cheese for cheesy dynamite chicken buns versions. Learn more about Asian-style bun toppings and techniques.
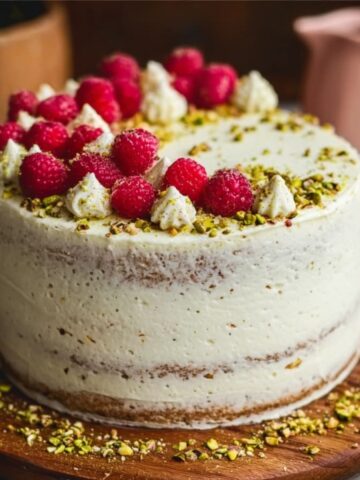
More Recipes You'll Love
These dynamite chicken buns are perfect for parties and casual dinners! When I'm serving these crispy sliders and want more comforting chicken dishes, my White Chicken Chili Recipe brings hearty beans and tender chicken in a creamy, flavorful broth that warms you from the inside out. For another show-stopping chicken main with that same crowd-pleasing appeal as these dynamite chicken sliders, my Marry Me Chicken Recipe delivers creamy sun-dried tomato sauce so good it'll make anyone want to propose. And when you want rich, indulgent flavors with the satisfying comfort of these spicy dynamite chicken buns, my French Onion Pot Roast Recipe combines tender beef with sweet caramelized onions for a dinner that feels like a warm hug!
Dynamite Chicken Buns
Ingredients
Equipment
Method
- Pat chicken breasts completely dry with paper towels. Pound each breast to ½-inch even thickness using a meat mallet. Season generously with salt and pepper on both sides. Let sit at room temperature for 15 minutes before breading.
- Arrange three shallow dishes in a row. Mix flour with half the garlic powder, onion powder, and paprika in dish one. Beat eggs with a splash of water in dish two. Combine panko with remaining spices in dish three.
- Coat each chicken piece in flour first and shake off excess. Dip in egg mixture and let excess drip off. Press firmly into panko on both sides - really press it in. The pressing step is critical for coating that stays on during frying.
- Whisk together mayonnaise, sriracha, sweet chili sauce, and honey in a mixing bowl. Add minced fresh garlic and lime juice. Start with 3 tablespoons sriracha and adjust to taste. Let flavors meld for 10 minutes while chicken rests.
- Heat ½ inch of vegetable oil in large skillet over medium-high heat to exactly 350°F. Use a cooking thermometer to monitor temperature. Test with a bread cube - it should sizzle and brown in about 60 seconds.
- Fry only 2-3 pieces at a time without crowding the pan. Cook 4-5 minutes per side until deep golden brown and internal temperature reaches 165°F. Monitor oil temperature constantly and adjust heat to maintain 350°F. Transfer to wire rack.
- Lightly toast slider buns in a dry skillet or under the broiler for 1-2 minutes. This creates structure that won't get soggy from the sauce.
- Spread generous dynamite sauce on both sides of each bun. Layer crisp lettuce on the bottom bun. Add hot fried chicken. Top with cucumber slices, pickles, and cheese if using. Add more sauce and top bun. Serve immediately while chicken is hot and crispy.
Nutrition
Notes
Tried this recipe?
Let us know how it was!Related
Looking for other recipes like this? Try these:

Pairing
These are my favorite dishes to serve with recipe:


Leave a Reply