

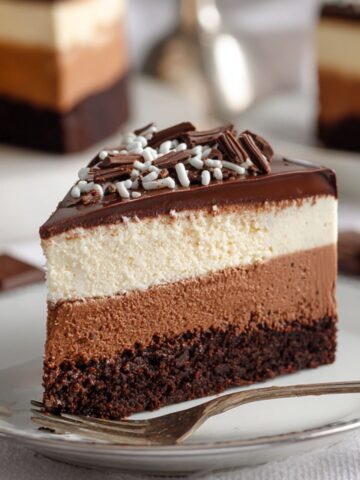
Chocolate Icebox Cake delivers the ultimate nostalgic dessert experience without requiring you to ever turn on the oven. The simple technique of layering crisp chocolate wafers with softly whipped cream transforms basic ingredients into a stunning, sliceable masterpiece that mimics a traditional baked sponge overnight. I assemble this classic Chocolate Icebox Cake on warm summer afternoons because it takes less than twenty minutes and guarantees an impressive, cooling presentation.


Why This Chocolate Icebox Cake Works Every Time
The magic of this dessert lies in the chemical transfer of moisture from the freshly whipped cream directly into the dry, crisp cookies. Allowing the assembly to rest in the refrigerator for at least six hours creates a completely unified, tender crumb that feels indistinguishable from a delicate cake. After making this Chocolate Icebox Cake dozen of times, I found that maintaining a stiff peak on your whipped cream ensures the structure holds together perfectly upon slicing.
Jump to:
- Why This Chocolate Icebox Cake Works Every Time
- What You'll Need for This Chocolate Icebox Cake
- How to Make Chocolate Icebox Cake
- Top Tip
- Substitutions and Variations
- Storage and Make-Ahead Instructions
- What to Serve With This Chocolate Icebox Cake
- My Experience With This Chocolate Icebox Cake Recipe
- Frequently Asked Questions
- More Recipes to Try
- Chocolate Icebox Cake
- Related
- Pairing
What You'll Need for This Chocolate Icebox Cake
Gathering high-quality components ensures the cleanest flavor profile for your dessert.
Main Ingredients
Heavy whipping cream: Provides the essential moisture needed to soften the cookies while offering a rich, blank canvas that contrasts the dark cocoa notes. Choose a brand with at least thirty-six percent milk fat for the most stable, voluminous whip.
Powdered sugar: Dissolves instantly into the cold cream to add a subtle sweetness without leaving behind any gritty, crystallized texture.
Vanilla extract: Enhances the dairy elements and acts as a flavor bridge between the sweet cream and the slightly bitter chocolate wafers.
Chocolate wafer cookies: These incredibly thin, crisp discs form the structural foundation of the entire dessert. They absorb the dairy perfectly to create the signature cake-like consistency that makes this dish famous.

Optional Ingredients
Cocoa powder: A light dusting over the top layer just before serving adds an elegant, truffle-like visual finish.
Espresso powder: Whisking a small spoonful into the cream mixture brings a deep, roasted coffee flavor that beautifully complements the chocolate.
Crushed cookies: Sprinkling broken wafer pieces around the edges introduces a welcome textural crunch against the soft cream.
Find Exact Measurements in the Recipe Card Below
How to Make Chocolate Icebox Cake
This simple technique requires minimal active prep time before the refrigerator does all the heavy lifting.
Whip the Cream
Pour the heavy whipping cream, powdered sugar, and vanilla extract into a large chilled metal bowl. Beat the mixture on medium-high speed until firm, stiff peaks form and the whisk leaves very distinct, deep trails. You want the cream sturdy enough to support the weight of the cookies without sliding.

Anchor the Base
Spread a thin, even layer of the whipped cream directly onto the center of your serving platter to act as a glue. Arrange a single, flat layer of chocolate wafers in a circular pattern over the cream, placing one cookie right in the center to build a solid foundation.
Build the Layers
Spread a generous, even spoonful of whipped cream over the first cookie tier to cover them completely. Add another flat layer of chocolate wafers on top, and repeat this alternating process until you have used all the cookies. The tall stack will look slightly intimidating but it settles beautifully as it chills.

Frost the Exterior
Coat the entire outside of the stacked dessert with the remaining whipped cream. Use a small offset spatula to create a smooth, clean finish along the top and sides, ensuring no cookie edges remain exposed.

Chill the Dessert
Cover the assembled Chocolate Icebox Cake loosely with a tented piece of plastic wrap and refrigerate it for a minimum of six hours. The extended wait time is absolutely crucial because it allows the moisture to fully penetrate and soften the crisp wafers.
Serve the dessert straight from the cold refrigerator for the absolute cleanest, sharpest slices. A thin, warm blade will glide right through the delicate layers.
Top Tip
Use thoroughly chilled equipment – Place your mixing bowl and the metal beaters in the freezer for fifteen minutes before you begin to achieve maximum volume. The cold environment helps the fat molecules in the cream trap air much faster and hold their shape longer.
Whip to the correct stiffness – Your cream needs to hold a very firm peak when you lift the beaters straight up. Soft cream will cause your Chocolate Icebox Cake layers to slide off each other and collapse during assembly.
Do not rush the resting phase – You must commit to the full six-hour chilling window to achieve the proper texture. Cutting into the dessert too early will result in crunchy, unyielding cookies that shatter your beautiful slices.
Protect the decorative finish – Insert a few standard wooden toothpicks into the top of the frosted dessert before draping the plastic wrap over it. This creates a protective tent that prevents the wrap from ruining your perfectly smooth cream exterior.
Create pristine presentations – Keep a tall glass of hot water and a clean towel next to your cutting board when you are ready to serve. Dipping your knife into the hot water and wiping it completely dry between every single cut keeps the distinct alternating layers looking sharp.
Apply garnishes at the end – Wait to add any cocoa powder dustings or crushed cookie toppings until right before you slice the dessert. Adding dry garnishes before the long chill time will cause them to absorb moisture and become unpleasantly soggy.
Check your cookie thickness – If you cannot find the traditional ultra-thin wafers and must substitute a thicker variety, you will need to extend the chilling time. Thicker cookies often require a full twenty-four hours to reach that tender, fork-yielding consistency.
Keep the serving area cool – This dessert melts rapidly in warm environments due to the high volume of whipped cream. Keep the platter in the refrigerator until the exact moment you intend to portion it out for your guests.
Substitutions and Variations
Mocha Flavor Variation
Dissolve a tablespoon of instant espresso powder into the vanilla extract before adding it to your heavy cream. This creates a wonderful mocha chocolate icebox cake ina garten style profile that adults absolutely love. The deep coffee notes intensify the richness of the dark cocoa wafers.
Mint Chocolate Swap
Replace the standard vanilla extract with a half teaspoon of pure peppermint extract for a refreshing holiday twist. You can fold a handful of miniature chocolate chips into the cream for an extra burst of texture.
Fruit Layered Version
Place incredibly thin slices of fresh strawberries between every other tier of cookies and cream. The bright acidity of the fresh fruit cuts through the rich dairy and provides a beautiful pop of red color when sliced.
Peanut Butter Infusion
Beat a half cup of creamy peanut butter into the powdered sugar and cream mixture until completely smooth. The resulting peanut butter mousse pairs incredibly well with the crisp chocolate cookies for a classic flavor combination.
Oreo Cookie Adaptation
Swap out the delicate chocolate wafers for standard chocolate sandwich cookies to create a popular Oreo icebox cake. You will need to increase the resting time to at least twelve hours since the sandwich cookies are significantly thicker and harder to soften.
Storage and Make-Ahead Instructions
Refrigerator Storage
Keep the Chocolate Icebox Cake loosely covered with plastic wrap in the coldest part of your refrigerator for up to three days. The texture actually becomes softer and more cohesive on the second day, making it an ideal make-ahead dessert.
Freezer Storage
Wrap the fully chilled, completely assembled dessert tightly in two layers of plastic wrap and one layer of aluminum foil. You can freeze it like this for up to one month without sacrificing the flavor or texture. Let it thaw in the refrigerator for four hours before you attempt to slice it.
Make-Ahead Preparation
Assemble the entire dessert twenty-four hours before your event to guarantee the perfect cake-like consistency. Waiting to apply the final dusting of cocoa powder or crushed cookie garnishes ensures the presentation looks fresh.
Handling Leftovers
Store any remaining sliced portions in an airtight plastic container to prevent the cream from absorbing savory odors from the fridge. Press a small piece of parchment paper directly against the exposed cut sides to keep the cream from drying out.
What to Serve With This Chocolate Icebox Cake
Fresh Summer Berries
A side of fresh raspberries or macerated strawberries cuts through the heavy richness of the whipped cream beautifully. The bright acidity provides a perfect, refreshing flavor contrast that cleanses the palate.
Dark Roast Coffee
Serve generous slices alongside a piping hot mug of dark roast coffee or a shot of unsweetened espresso. The bitterness of the brewed coffee highlights the sweet, creamy layers of the Chocolate Icebox Cake perfectly.
Salted Caramel Drizzle
Pour a very light stream of warm salted caramel over individual slices right before carrying the plates to the table. This adds an unexpected sweet and salty dimension that elevates the simple ingredients.
Toasted Almonds
Sprinkle a handful of lightly toasted, sliced almonds over the top of the dessert for a sophisticated crunch. The nutty, earthy flavor complements the deep cocoa notes of the wafer cookies.
Vanilla Bean Anglaise
Pool a small amount of warm vanilla bean custard sauce at the bottom of the dessert plate before placing the cake slice down. The double dose of vanilla creates a luxurious, restaurant-quality presentation.
My Experience With This Chocolate Icebox Cake Recipe
The first time I attempted to make this Chocolate Icebox Cake dessert, I made the frustrating mistake of trying to serve it after only two hours in the refrigerator. The cookies were still entirely crunchy, and the whole structure shattered into a messy pile of cream and crumbs when I applied the knife. After testing this exact Chocolate Icebox Cake technique twelve different times, I learned that a minimum of six hours is absolutely mandatory for the chemical magic to happen. The whipped cream actually needs that long, undisturbed resting period to transfer its moisture into the dry baked wafers. You will know the process is complete when a dull butter knife slides straight through the center with zero resistance.
I also quickly discovered that not all store-bought cookies work equally well for this specific layering method. I initially tried using standard, thick chocolate chip cookies, but they stubbornly refused to soften properly even after sitting covered overnight. Switching exclusively to ultra-thin chocolate wafers completely transformed the texture into a genuine, fluffy sponge cake replica that fools everyone. My family now requests this Chocolate Icebox Cake particular treat for almost every summer gathering because it feels so light and refreshing. It remains my absolute favorite way to produce an elegant, tiered dessert without ever turning on my oven.
Similar Recipes You Might Like
Frequently Asked Questions
Can I use a different type of cookie for a Chocolate Icebox Cake?
Yes, you can substitute graham crackers or thin chocolate chip cookies for a different flavor profile. Just be aware that thicker cookies require a significantly longer chill time to soften completely.
Why is my whipped cream sliding off the cookies?
Your heavy cream likely did not reach stiff peaks before you began assembling the dessert tiers. Make sure the cream holds its shape firmly and stands straight up on the whisk before you start frosting.
Can I make this Chocolate Icebox Cake two days in advance?
Yes, this dessert actually improves in texture if made twenty-four to forty-eight hours ahead of time. Keep it tightly covered in the refrigerator so the cream does not dry out or crack.
Do I have to use homemade whipped cream?
No, you can fold in thawed store-bought whipped topping if you prefer a faster shortcut method. However, fresh cream provides a richer flavor and superior texture that perfectly balances the sweet wafers.
More Recipes to Try
If you are looking to round out your entertaining menu, try serving a refreshing Peach Mint Julep alongside this dessert to keep your guests cool. For those who want extra decadence, a scoop of rich Chocolate Ice Cream pairs beautifully with a slice of the cake. You can even enjoy leftover Chocolate Icebox Cake the next morning after a hearty Denver Omelette Recipe to start your weekend off right.
Chocolate Icebox Cake
Ingredients
Equipment
Method
- Pour heavy cream, powdered sugar, and vanilla extract into a chilled bowl and beat until stiff peaks form.

- Spread a thin layer of whipped cream on a serving platter and arrange a circular layer of chocolate wafers on top.
- Cover the cookies with whipped cream and add another layer of wafers, repeating until all cookies are used.

- Frost the entire outside of the stacked dessert with the remaining whipped cream using an offset spatula.

- Cover loosely and chill in the refrigerator for at least six hours until the cookies are completely softened.
Nutrition
Notes
Tried this recipe?
Let us know how it was!Related
Looking for other recipes like this Chocolate Icebox Cake? Try these:


Pairing
These are my favorite dishes to serve with Chocolate Icebox Cake:


Leave a Reply